 how-to
Best Ways to Slice Country Ham: A Complete Guide
Table of Contents
- Why Slicing Technique Matters for Country Ham
- Choosing the Best Knife for Slicing Ham
- How to Slice a Whole Country Ham: Step-by-Step
- Getting Country Ham Slice Thickness Right
- Slicing With or Across the Grain
- How to Store Sliced Country Ham
- Pan-Frying Your Slices: Tips for Best Results
- Common Mistakes to Avoid When Slicing
- Frequently Asked Questions
Last Updated: October 13, 2026
Why Slicing Technique Matters for Country Ham
When you slice country ham, you're working with a concentrated, intensely flavored product. The salt cure and aging process create bold, salty meat that demands respect at the cutting board.
Slicing technique matters most here. Thin slices let the flavor shine without overwhelming your palate; thick slices taste too salty and heavy.
At Padow's Hams Co., we've been serving customers for over 85 years.
The good news: learning how to slice country ham is straightforward once you understand the basics. You need a sharp knife, the right positioning, and knowledge of which direction to cut.
Choosing the Best Knife for Slicing Ham
Most guides tell you to use a sharp knife but never say which knife, how sharp, or how to hold it.
Blade type and length
For a whole bone-in ham, a carving knife or slicer with an 8- to 10-inch blade is the right tool. The length lets you make one long, continuous draw stroke from heel to tip instead of a sawing motion; a short paring knife tears the muscle fibers and leaves ragged edges.
Blade profile matters too:
- Granton-edge (dimpled) slicer, the oval hollows along the side reduce friction and drag, which helps when you are pulling thin slices off a sticky, cured surface. This is the most forgiving choice for beginners.
- Straight-edge slicer, works just as well if it is genuinely sharp. Cleaner cut, but more prone to sticking.
- Serrated bread knife, a fallback only. It will get through the ham, but it saws the fibers instead of slicing them, and the slices look torn.
- Chef's knife, acceptable in a pinch, but the curved belly makes it hard to keep a level, bone-parallel angle across a long ham.
How sharp is sharp enough
A knife that shaves arm hair or cleanly cuts a ripe tomato with no pressure is sharp enough. If you have to lean into the blade to start a cut, stop and sharpen, a dull blade is the most common cause of slips and uneven slices.
A honing steel realigns the edge before each session (a few light strokes per side at roughly a 20-degree angle); a pull-through or whetstone sharpener removes metal and restores a dulled edge. Hone every time, sharpen every few months.
Grip and safe cutting technique
Two grips cover almost every situation:
- Pinch grip, thumb and index finger pinch the blade just ahead of the bolster, remaining fingers wrap the handle. This gives the most control over blade angle, which is exactly what bone-parallel slicing demands.
- Handle grip, full hand on the handle. Fine for lighter work, but you lose some angle control on a dense ham.
On your non-knife hand, use a claw grip: curl your fingertips under and let your knuckles guide the blade. Never let a flat palm sit in the blade's path.
Cutting board setup
A large, heavy wood or composite board with a juice groove gives you room for a full draw stroke and catches the moisture country ham releases. Place a damp kitchen towel underneath to lock the board in place, this single step prevents more accidents than any other.
Quick knife decision guide
| Situation | Best choice |
|---|---|
| Whole bone-in ham, first time | 10-inch Granton-edge slicer |
| Thin breakfast slices | 8- to 10-inch straight slicer, very sharp |
| Boneless or partial ham | 8-inch slicer or chef's knife |
| No slicer available | Long serrated knife, accept rougher edges |
Store the knife on a magnetic strip or in a block. A knife that bangs around in a drawer loses its edge fast, and a dull knife is the one that cuts you.
How to Slice a Whole Country Ham: Step-by-Step
Positioning and Stabilizing Your Ham
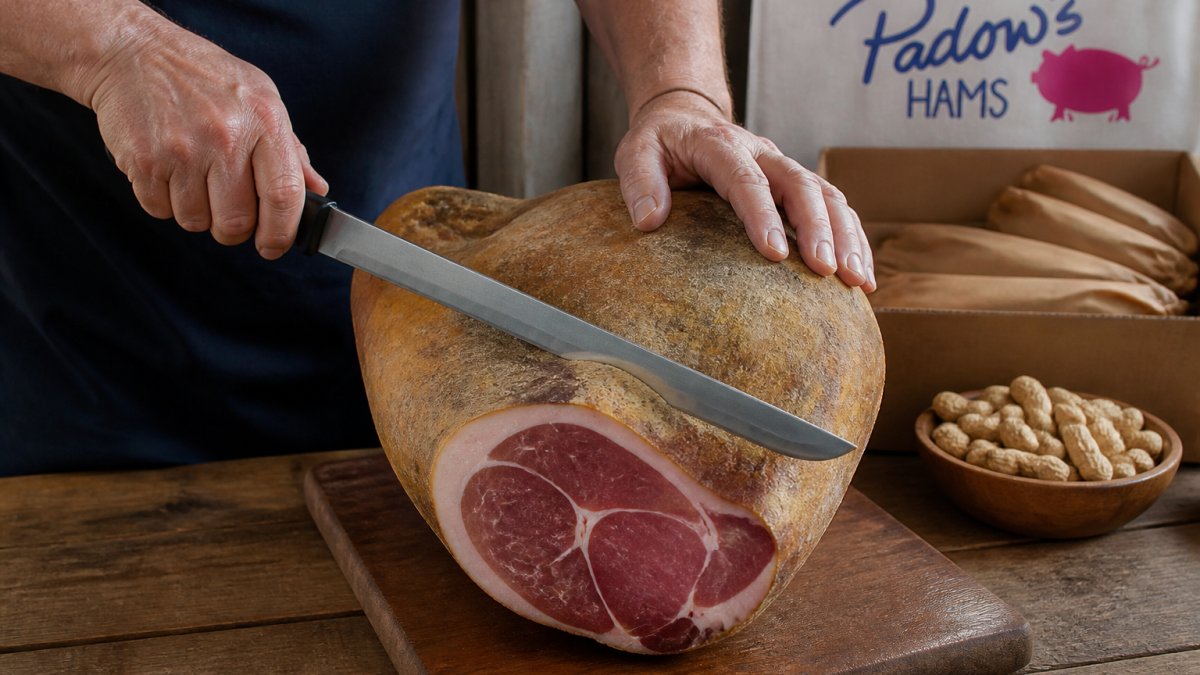
Place the ham flat side down on the cutting board for a stable base that won't roll or shift, with the bone facing toward you so you can see its shape and work around it. For a large ham, put a damp towel under the board to prevent slipping.
Slicing Parallel to the Bone
The key rule: slice parallel to the bone, not straight down into it.
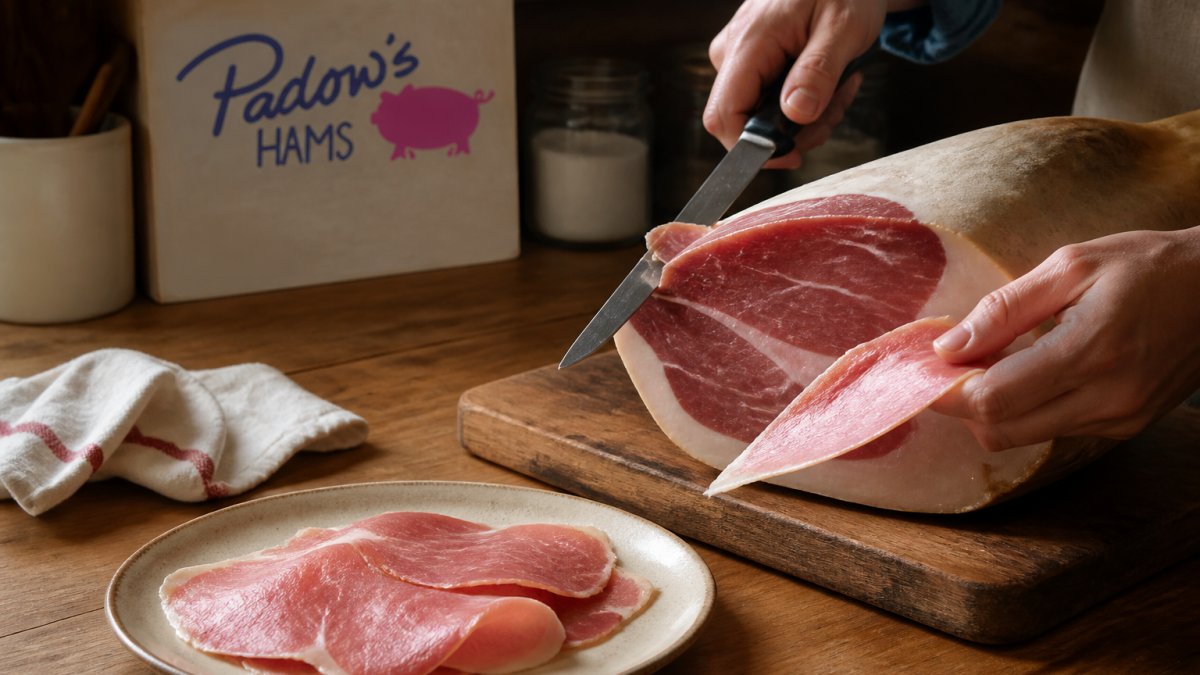
The bone runs along one side of the ham; imagine it as a guide rail and let your blade travel alongside it, not across it. Start at the edge farthest from the bone and make your first cut about a quarter-inch thick, using smooth, steady strokes and letting the knife do the work. Work across the ham, always parallel to the bone, and each slice will separate cleanly into thin, uniform pieces. This method produces the most tender slices because the muscle fibers separate cleanly instead of being cut through.
Why You Should Avoid Slicing Straight Down
Slicing straight down into the bone is the mistake most people make. Your knife hits the bone at a harsh angle, bounces off or gets stuck, and the meat around the bone gets crushed instead of sliced. Straight-down cuts also produce uneven pieces, some thick, some thin, some chewy, some falling apart, and the bone can splinter, leaving fragments in your meat. Parallel cuts avoid all of this: the blade glides alongside the bone, you keep control, and you get uniform, tender slices every time.
Getting Country Ham Slice Thickness Right
Thickness changes how the ham cooks, how salty it tastes, and how tender it feels. Here is the practical version.
Thickness by intended use
| Use | Target thickness | Why |
|---|---|---|
| Pan-fried breakfast slices | 1/8 inch (about 3 mm) | Cooks through in ~1 minute per side; browns evenly without drying |
| Biscuit or slider portions | 1/8 to 3/16 inch | Fits the bread, stays tender, doesn't overpower |
| Appetizer / charcuterie | 1/16 to 1/8 inch | Thin enough to eat in one bite; salt reads as seasoning, not assault |
| Centerpiece / dinner plate | 1/4 inch | Holds shape on the plate, still cooks in 2-3 minutes per side |
| Diced for seasoning (beans, greens) | 1/4 to 1/2 inch cubes | Needs to survive long simmering without dissolving |
A useful rule of thumb: the saltier the ham, the thinner the slice. Country ham is cured and aged, so its salt concentration is high; thin slices let you eat more bites without the salt stacking up, while thick slices taste overwhelming by the third bite.
Why thickness and grain work together
Thickness alone does not determine tenderness, grain direction does. A 1/4-inch slice cut across the grain will be more tender than a 1/8-inch slice cut with the grain, because the long muscle fibers in the latter resist your teeth no matter how thin they are.
So the two decisions are linked:
- Across the grain + thin = most tender, best for frying and biscuits.
- Across the grain + thick = substantial but still chewable, good for a dinner plate.
- With the grain + any thickness = chewier; only choose this if you specifically want a firmer bite.
How to find the grain
Look at the cut face of the ham: the fine parallel lines running in one direction are the muscle fiber. Your knife should cross those lines at roughly 90 degrees. On a whole bone-in ham, the bone often runs roughly parallel to the grain, which is why bone-parallel slicing and across-the-grain slicing tend to line up.
Test-slice method
Cut your first slice at 1/8 inch, across the grain, and taste it plain, then fried. If the salt feels balanced, keep that thickness; if it feels intense, go thinner; if it feels weak or falls apart, go thicker. Every ham cures and ages differently, so the first slice is your calibration.
Consistency beats precision
You need slices uniform enough to cook at the same rate. A pile ranging from 1/16 to 3/8 inch will cook unevenly, some burn before others are warm. Aim for a consistent target and accept small variation; uniform slices are the biggest upgrade most home cooks can make.
Slicing With or Across the Grain
The grain is the direction the ham's muscle fibers naturally align. Slicing across the grain (perpendicular to the fibers) cuts them short so they don't resist your teeth, the preferred method for most preparations. Slicing with the grain leaves the fibers long and produces chewier meat, which is less common for country ham because the meat is already dense. To find the grain, look for fine lines running in one direction on the ham's surface and cut across them, not along them.
How to Store Sliced Country Ham
Store sliced country ham in an airtight container or tightly wrapped in plastic wrap to keep it from drying out; properly stored slices last about one week in the refrigerator. Don't use a regular plastic bag, air exposure oxidizes the meat, dries the edges, and dulls the flavor. If you slice more than you'll use in a week, wrap each slice individually in plastic wrap, place them in a freezer bag, and freeze for several months. Thaw frozen slices in the refrigerator overnight, never at room temperature.
Pan-Frying Your Slices: Tips for Best Results
Pan-frying is the classic way to cook country ham slices. Heat a cast-iron or other heavy skillet to medium-high (avoid non-stick, which doesn't brown meat as well) and place the slices in the dry pan, no oil needed, since the ham's fat releases as it cooks. Cook about one minute per side for a light brown color, watching for the edges to curl slightly, which signals the slice is done; remove it immediately, because overcooked ham turns tough and rubbery. For very thick slices, reduce the heat to medium and cook two to three minutes per side so the inside warms without burning.
Common Mistakes to Avoid When Slicing
Using a dull knife is the biggest mistake, it forces you to press hard, which means less control and more slips and uneven slices. Slicing straight down into the bone crushes the meat and risks bone fragments.
Slicing country ham properly transforms your cooking experience. The right technique produces beautiful, uniform slices that cook evenly and taste balanced. Padow's Hams Co. has been delivering premium Virginia country hams since 1936, and we know that proper preparation is where the real flavor comes through.
Frequently Asked Questions
What is the best way to slice country ham?
Slice country ham parallel to the bone using a sharp slicing knife, working at a slight angle. This approach yields tender slices and prevents the blade from hitting bone. Thin slices (about one-eighth to one-quarter inch) showcase the ham's concentrated flavor best. Always slice across the grain for maximum tenderness, and keep your knife sharp to prevent tearing the meat.
How thick should country ham slices be?
Thickness depends on your intended use. For pan-frying or breakfast slices, aim for a moderate thickness. For appetizers or biscuits, thinner slices work well. Thinner slices highlight the ham's bold, salty flavor profile, while slightly thicker cuts provide more substance. Adjust based on personal preference and how you plan to serve the ham.
What knife should you use to slice country ham?
Use a sharp slicing knife or carving knife with a long, thin blade. The blade should be at least 8 inches long and razor-sharp to cut through the meat cleanly without crushing fibers. A dull knife produces uneven, ragged slices and requires excessive pressure. Keep your knife sharp with regular honing.
How should you store sliced country ham?
Store sliced country ham in an airtight container in the refrigerator for about one week. You can also wrap slices individually in plastic wrap or parchment paper to prevent drying. For longer storage, freeze slices for several months in a freezer-safe container. Thaw frozen slices in the refrigerator before using. Keep the ham away from strong-smelling foods, as the slices can absorb odors.